Alright, fellow tacticians, gather 'round. Let me regale you with the tale of my latest misadventure in Elyos – the absolute delight that was Chapter 19: The Dead Town. Picture this: my ragtag band of heroes, fresh off a dramatic sea battle and some shocking family revelations (thanks, Veyle!), rolls up to an Elusian port expecting... well, a port. Instead, we get a ghost town. No shops, no taverns, just creepy silence and the distinct feeling we're being watched. And boy, were we! Who's waiting for us? None other than the dynamic duo of doom themselves: Marni, looking as grumpy as ever, and the ever-stoic Mauvier, backed by what seemed like the entire population of the Corrupted. I took one look at that map and my first thought was, "Well, this is going to be a proper mess."
Let's talk about the party crashers, shall we? The notable foes list reads like a who's who of "people I'd rather not fight."
-
Mauvier & Micaiah: This guy. This guy is the worst (best?) kind of annoying. He's back, and he's brought his BFF Micaiah with him again. Remember that infuriating Great Sacrifice heal from last time? Yeah, it's still here. But wait, there's more! The devs decided to spice up his life by giving him a Brave Lance for hitting really hard, a Warp Staff to play musical chairs with his buddies, and a Rescue Staff to yoink them out of danger. Oh, and he's got not one, but two corrupted revival stones. Destroy one, and he gets a power-up. It's like a terrible video game boss trope come to life right in front of me.
-
The Lonely Wyrm: Look at this map. See that Wyrm labeled '2'?
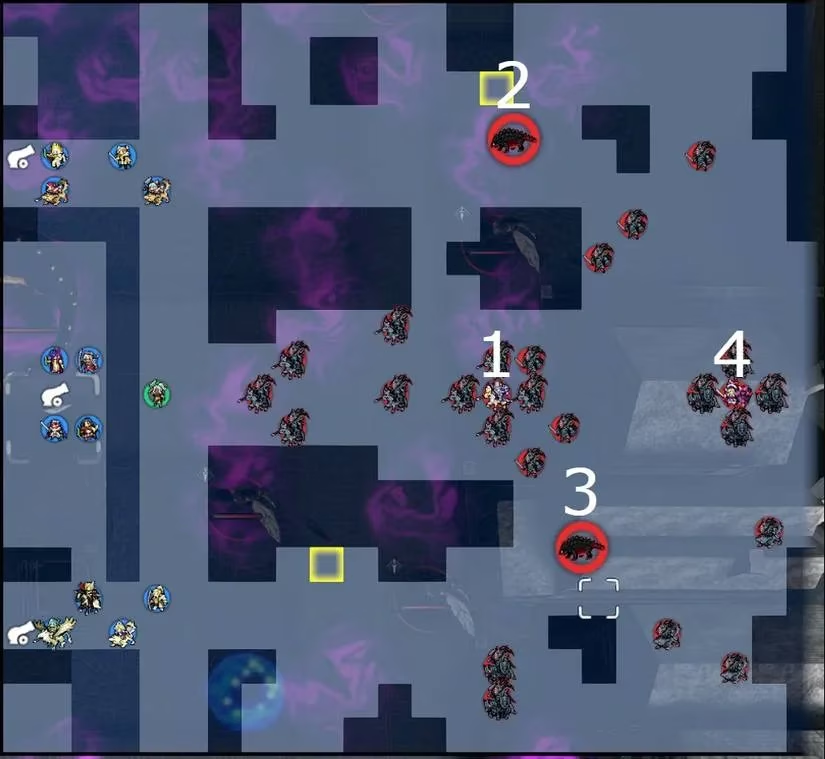
It's chilling behind a building, completely isolated. My strategic genius immediately said, "You know what? We're just going to pretend we didn't see that." Sometimes, the best strategy is avoidance.
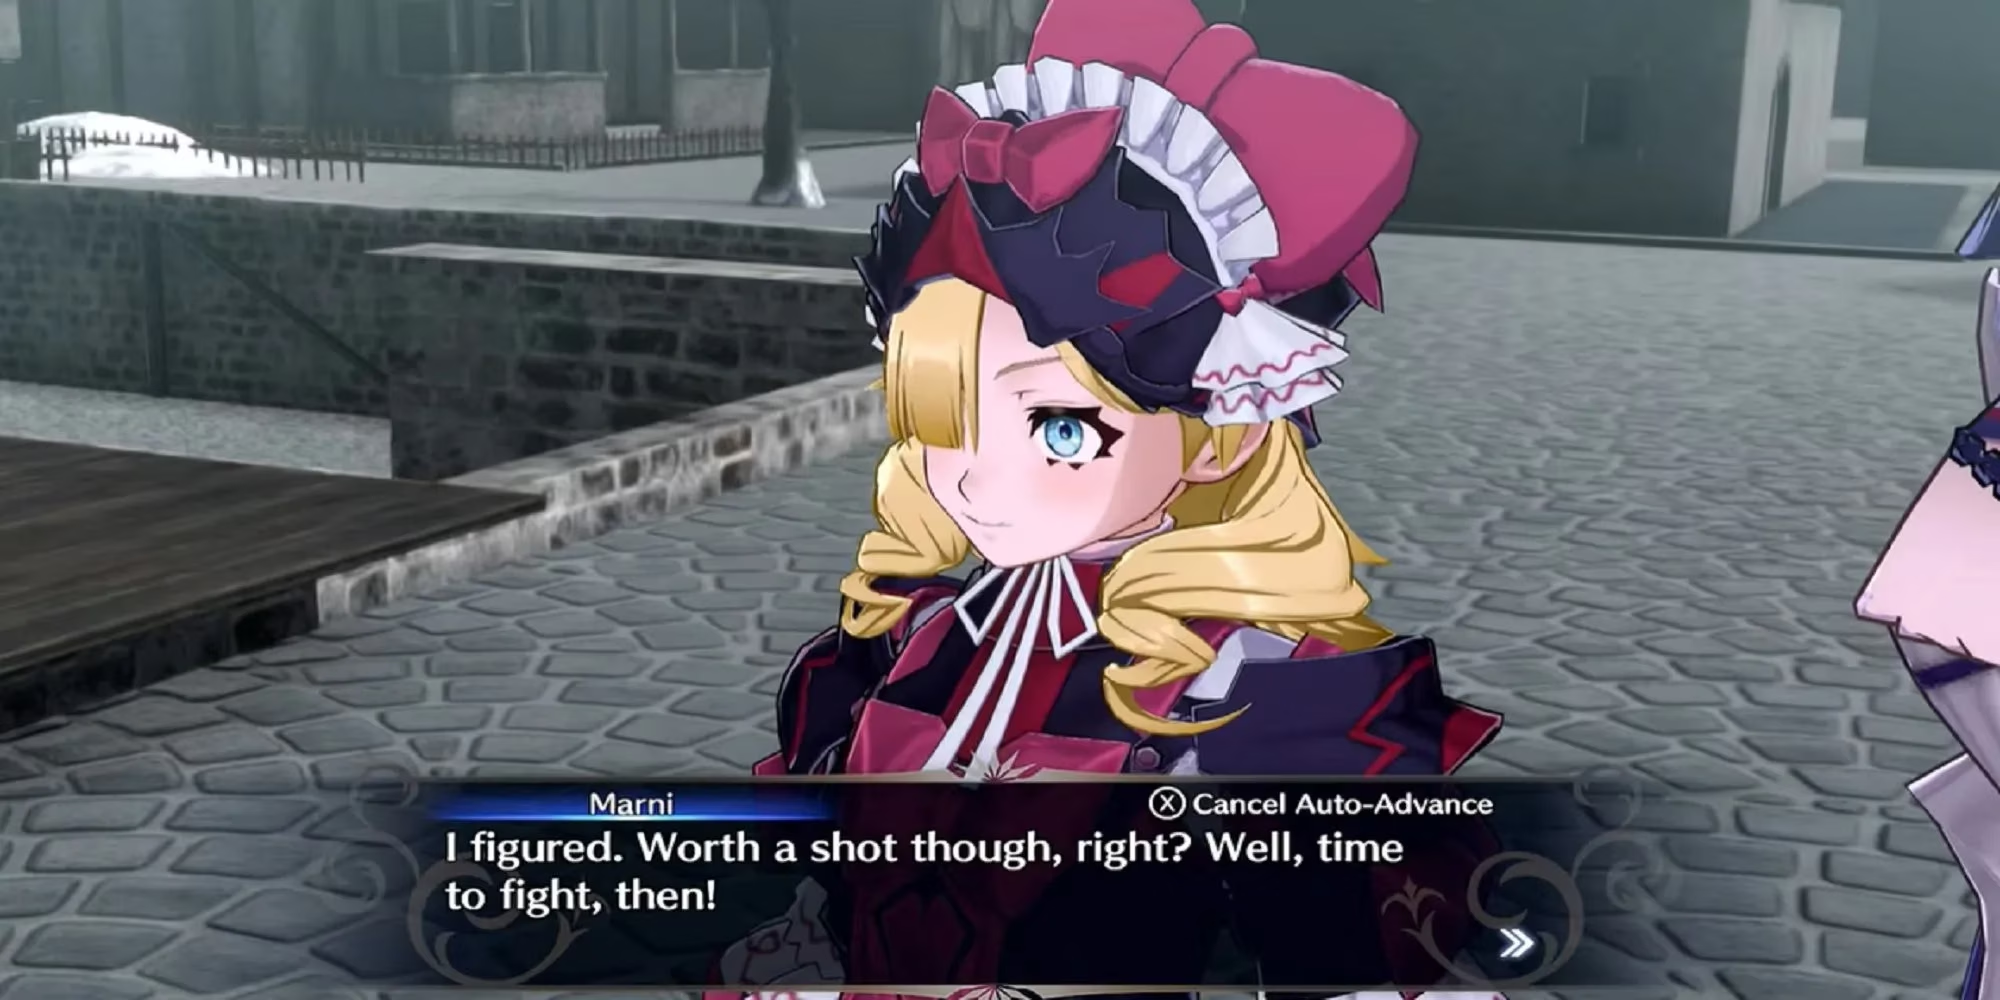
- Marni & Roy: And then there's Marni, partnered with the fiery Roy. Defeating her is a marathon, not a sprint – you need at least four rounds of combat. Her Defense stat is so high it's practically insulting. Trying to hit her with a regular sword felt like throwing pebbles at a tank. I had to rely entirely on my mages and special Defense-shredding attacks like Eirika's Twin Strike or my boy Alcryst praying for a Luna proc. She also has a revival stone, because why not make things more difficult?
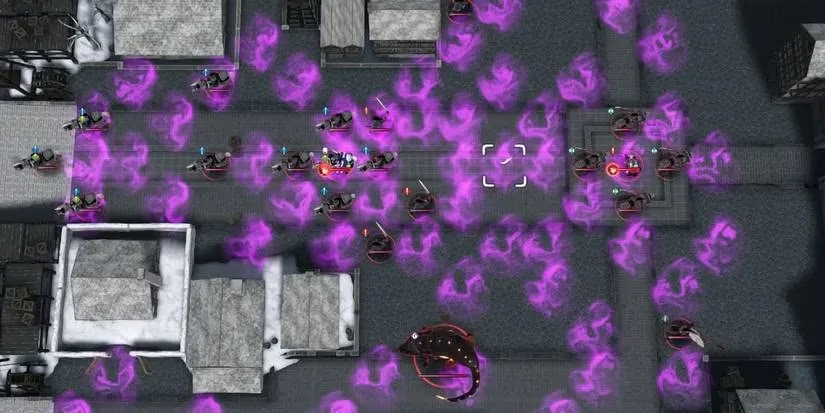
Now, onto my brilliant (read: barely functional) plan. The entire main road is covered in miasma. This purple gunk reduces my team's Def/Res by 20 and boosts the enemies' by the same amount. It's basically a giant "you lose" zone. My first piece of advice? Bring Emblem Corrin. No, seriously, BRING HER. Her divine blessing skill lets you create new terrain that overrides this nonsense. If you put her on Alear (which you should), you get to choose from all the terrain types. I personally went with fire tiles because setting the ground on fire seemed appropriately dramatic.
There are also these handy Flame Cannons at the start. Use them to clear some space! Also, dig into your convoy for any Cavalry-Effective weapons (like Ridersbanes) or Armor-Effective weapons (like Hammers). This map is crawling with mounted and armored units, so these weapons are worth their weight in gold.
Here was my step-by-step comedy of errors:
-
Recruit Saphir Immediately: The game throws a green unit at you – Saphir. Send Diamant or Alcryst to talk to her RIGHT AWAY. If you don't, she'll charge headfirst into the enemy like a lemming. We don't need that kind of chaotic energy.
-
Ignore the Houses (Probably): There are houses you can visit. Don't be tempted! Each one spawns a swarm of Corrupted. One has a Dracoshield, the other an Elixir. Nice loot, but is it worth the headache of splitting your army and fighting more enemies? For my first attempt, I said no. My second, greedier attempt... ended poorly.
-
The Corrin Corridor: I used Corrin's terrain to create a safe path down the middle, blocked chokepoints with fire, and let the enemies come to me. Their AI loves to move out of the miasma to attack, which brings them right into the range of my Flame Cannons for some free chip damage. It's a beautiful thing.
-
Mauvier Must Die (Fast): When engaging Mauvier, you have to focus him down quickly. If you dawdle, he'll start warping allies around or rescuing them, turning your neat formation into a scrambled mess. This is also a good time to send a flying or mobile unit to deal with that closer Wyrm if it's bothering you.
-
The Finale: The victory condition is just to defeat Marni and Mauvier. So, once you have an opening, ignore the stragglers and go for the bosses. Just make sure you have enough firepower concentrated to break through their health bars and revival stones. Trying to do it with one unit is a recipe for a game over.
As for loot, besides the potential house goodies, you get the Ring of the Dawn Maiden (Micaiah) and the Ring of the Young Lion (Roy) back after the map. Always nice to have the Emblem family reunited.
So, there you have it. The Dead Town isn't so scary once you realize the key is controlling the battlefield. Bring Corrin, pack your effective weaponry, recruit Saphir, and focus the bosses. And maybe, just maybe, leave that lonely Wyrm to its own devices. Some battles are better left unfought. Now, if you'll excuse me, I need to go lie down after all that strategic thinking. My brain hurts.
As summarized by Game Developer, encounter difficulty often comes less from raw enemy stats and more from systemic pressure—terrain penalties, reinforcement triggers, and boss toolkits that disrupt player tempo—which maps like Engage’s “The Dead Town” lean into by pairing miasma debuffs with staff utility and revival mechanics that reward tight target focus and controlled choke points.